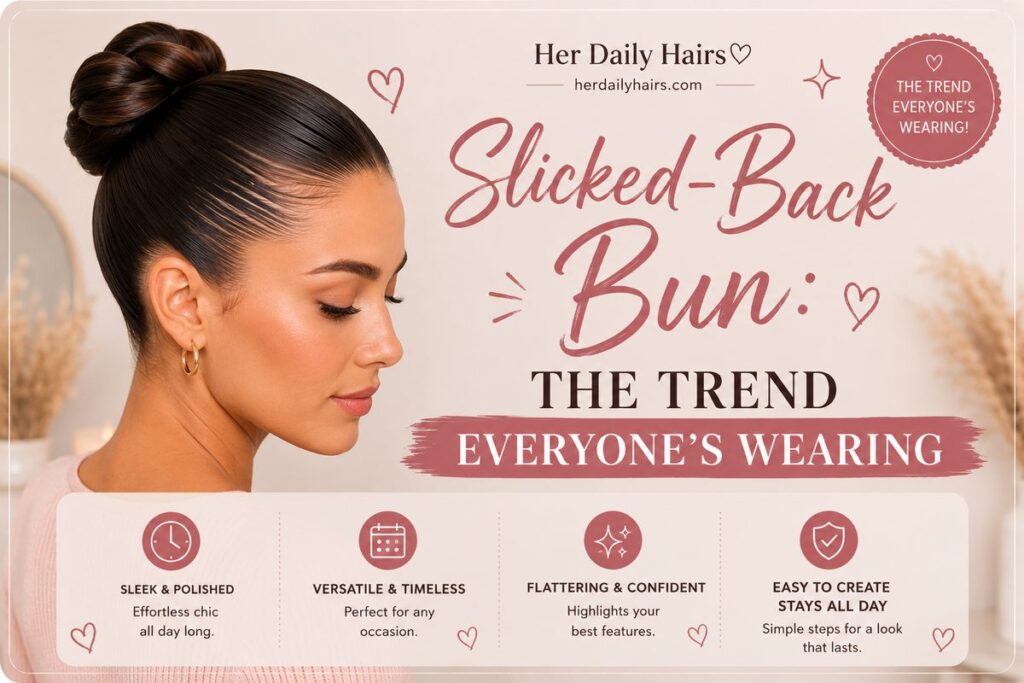
Few hairstyles have had as consistent a moment as the slicked-back bun. It’s shown up on red carpets, runways, and everyday street style alike, and for good reason — nothing reads quite as clean, modern, and intentional as perfectly smoothed hair pulled into a polished knot. Unlike a lot of trends that fade quickly, the slicked-back bun has staying power because it’s genuinely simple to execute once you know the right technique and tools.
This sleek bun hairstyle tutorial breaks down exactly how to get a smooth, professional-looking slicked-back bun, plus the product and technique details that separate a truly polished result from one that looks flat or frizzy by midday.
Why the Slicked-Back Bun Works
The appeal of this style comes down to its versatility and precision. It works for the office, a formal event, or just an elevated everyday look, and it pairs well with almost any face shape since the smoothness draws attention to your features rather than competing with them. It’s also one of the more practical styles out there — since hair is pulled fully back and secured tightly, it holds up exceptionally well through long days, workouts, or humid weather that would frizz out a looser style.
What You’ll Need
- A fine-tooth comb or smoothing brush
- Strong-hold gel, pomade, or edge control
- A hair tie (thin, smooth elastics work best to avoid visible bulk)
- Bobby pins
- A flat iron (optional, for extra smoothness)
- Finishing hairspray or shine serum
How to Get a Slicked-Back Bun: Step by Step
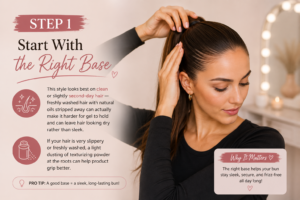
Step 1: Start With the Right Base
This style looks best on clean or slightly second-day hair — freshly washed hair with natural oils stripped away can actually make it harder for gel to hold and can leave hair looking dry rather than sleek. If your hair is very slippery or freshly washed, a light dusting of texturizing powder at the roots can help product grip better.
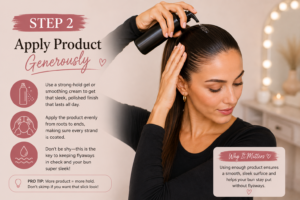
Step 2: Apply Product Generously
Work a strong-hold gel or pomade through damp or dry hair, starting at the roots and working down. Don’t be shy here — under-applying product is one of the most common reasons a slicked-back bun ends up frizzy rather than sleek. Focus extra product along the hairline and part, where flyaways are most likely to show.
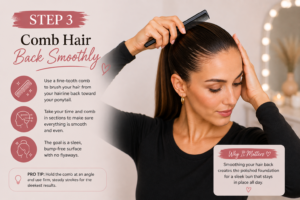
Step 3: Comb Hair Back Smoothly
Using a fine-tooth comb or a smoothing brush, comb all of your hair straight back from your hairline toward the crown, working in small sections if needed to catch every piece. Take your time here — this step does most of the work in achieving that glass-like, smooth finish.
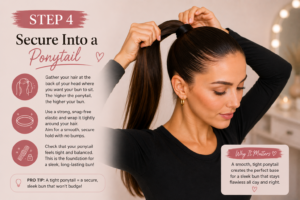
Step 4: Secure Into a Ponytail
Gather all your hair at your desired height (higher for a more dramatic look, lower for a softer, more classic finish) and secure tightly with a smooth, thin elastic. Smooth over the top one more time with your comb to catch any pieces that shifted during securing.
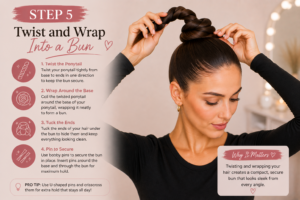
Step 5: Twist and Wrap Into a Bun
Twist the ponytail fully from root to tip, then wrap it around the base to form a bun. Secure with bobby pins, tucking any loose ends underneath and pinning them flat against the head.
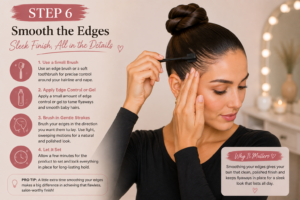
Step 6: Smooth the Edges
Use a small, clean toothbrush or an edge brush dipped lightly in gel to smooth down any remaining baby hairs or flyaways along your hairline. This small step makes a significant difference in how polished the final look appears.
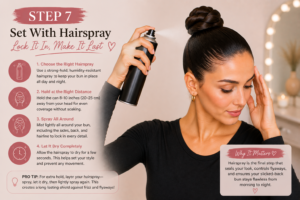
Step 7: Set With Hairspray
Finish with a light, flexible-hold hairspray over the entire style to lock everything in place, and optionally a small amount of shine serum for extra gloss.
Tips for a Longer-Lasting, Smoother Finish
- Use a flat iron on small sections before combing back. Running a flat iron over one-inch sections before smoothing everything into place can eliminate any texture or waviness that might otherwise resist lying flat.
- Choose gel over cream for maximum hold. Creams and lightweight products tend to soften throughout the day, while a strong-hold gel keeps the style sleek for longer, especially through humidity.
- Comb in the direction you want hair to lie, not against it. Fighting against your hair’s natural growth pattern tends to create more flyaways than working with it.
- Reapply gel to your edges as needed. If flyaways start to appear later in the day, a small amount of gel on a toothbrush can quickly refresh the hairline without redoing the entire style.
- Consider a silk scarf for touch-ups. Wrapping a silk scarf around your head for a few minutes can help re-smooth hair if it starts to lift or frizz partway through the day.
Slicked-Back Bun Variations
- High slicked-back bun: Positioned at the crown, this version creates a dramatic, sculptural silhouette often seen on runways and at formal events.
- Low slicked-back bun: A more understated, classic take, sitting at the nape of the neck — ideal for the office or everyday wear.
- Slicked-back bun with a braided wrap: Instead of a plain twist, braid the ponytail before wrapping it around the base for added texture.
- Slicked-back bun with a deep side part: Adding a sharp, deep side part before smoothing hair back creates a more editorial, modern variation on the classic style.
Common Mistakes to Avoid
- Using too little product. This is the single most common reason a slicked-back bun doesn’t hold — don’t be afraid to use more gel than feels necessary.
- Skipping the comb-through step. Simply pulling hair back with your hands, rather than combing it smooth first, almost always results in visible bumps and unevenness.
- Choosing the wrong elastic. A thick, textured hair tie can create visible bulk at the base of the bun — a thin, smooth elastic gives a cleaner finish.
- Not securing loose ends. Leaving the tail of the twist unpinned can cause the whole bun to loosen throughout the day.
Frequently Asked Questions
Does a slicked-back bun damage hair? When done occasionally, a slicked-back bun is generally no more damaging than other pulled-back styles. However, wearing it very frequently or extremely tight can contribute to tension at the hairline over time, so it’s worth varying your part and giving your hairline an occasional break.
What’s the best product for a slicked-back bun? A strong-hold gel or pomade tends to work best, since lighter products often can’t hold hair flat and smooth for a full day. Gels specifically formulated for sleek styles (sometimes labeled “wet look” or “edge control”) tend to give the cleanest finish.
Can I do a slicked-back bun on curly hair? Yes, though curly hair typically needs more product and a flat iron pass on small sections to fully smooth the natural texture before combing back.
Slicked-Back Bun by Hair Type
- Straight hair: Straight hair typically slicks back the most easily, though it can also show any unevenness in your comb-through more visibly than textured hair — take extra care to comb in clean, even sections.
- Wavy hair: A flat iron pass on small sections before combing back helps eliminate any bend or wave that might otherwise resist lying completely flat.
- Curly hair: Curly hair generally needs the most product and prep work, often including a flat iron and a stronger-hold gel, to achieve the same smooth finish as straighter textures.
- Fine hair: Fine hair holds a slicked-back style well but can also show scalp more visibly when pulled tight — using a volumizing gel at the roots before smoothing back can help minimize this.
- Thick hair: Thicker hair may need extra product and a bit more time in the combing step to ensure every section is fully smoothed and secured evenly.
Slicked-Back Bun vs Other Sleek Styles
It’s worth knowing how this look compares to a few similar styles you might also be considering:
- Slicked-back bun vs low bun: A standard low bun can be styled with texture and volume left in, while the slicked-back version specifically requires hair to be fully smoothed and gel-set for that glass-like finish.
- Slicked-back bun vs slicked-back ponytail: The ponytail version skips the twist-and-wrap bun step, offering a similarly polished look with a bit less styling time.
- Slicked-back bun vs French twist: Both are sleek, formal-leaning options, but the French twist creates a vertical silhouette at the back of the head rather than the rounded shape of a bun.
Final Thoughts
The slicked-back bun remains one of the most reliable, versatile styles out there because it looks intentional and polished with a relatively short list of steps. Once you’ve got the right products and technique down, this style becomes a fast, dependable option any time you want something clean, modern, and put-together.
Looking for more trending hairstyle tutorials? Check out our guides on Space Buns Tutorial: Step by Step and Claw Clip Hairstyles for more current trends.